How to Remove an Apple AirPrint Driver and Install an Epson Printer Driver on macOS
Applies To
- Operating Systems: macOS
-
Related Articles:
- KA-01093 (uninstalling Epson printer drivers generally)
Description
When connecting an Epson printer to a Mac for the first time, macOS may automatically add it using its built-in AirPrint driver instead of the Epson-supplied one. AirPrint works, but limits the available print settings — for example, ink level monitoring, maintenance utilities, and advanced print quality options aren't available. Epson recommends installing the Epson-supplied driver instead for full functionality — remove the AirPrint entry first so the correct driver can be installed and selected.
Solution
Checking Whether You Have the AirPrint Driver or the Genuine Epson Driver
Two ways to check — either is reliable on its own, but the second is more definitive if the first is unclear.
Common steps
-
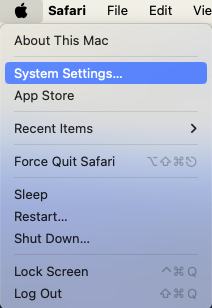
Click the Apple menu at the top left of the screen.

-
Click System Settings.
-
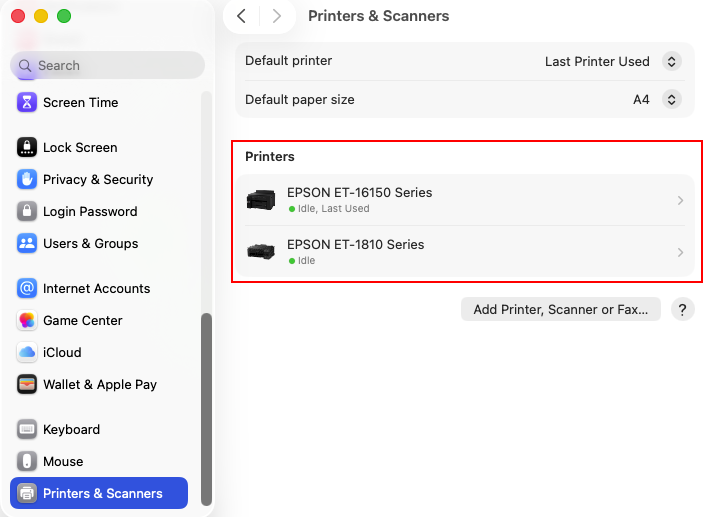
Select Printers & Scanners. Select the Epson Printer from the list.
Method 1: Check the "Kind" Value
-
Locate the Kind value for the printer.
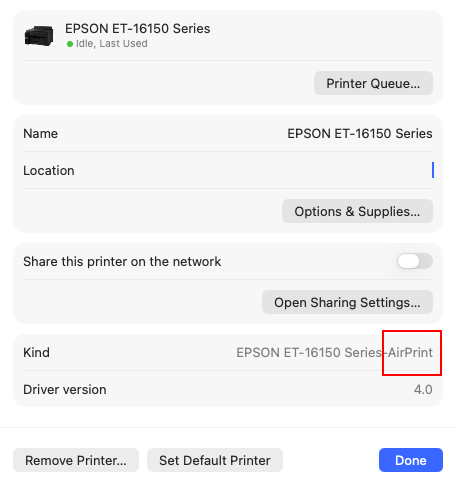
Note: If the Kind value ends in AirPrint (or shows Secure AirPrint, Generic PostScript Printer, or Bonjour), you're using a generic driver rather than the genuine Epson one. If it shows the Epson model name without any of these, the genuine driver is likely installed — confirm with Method 2 below if you're unsure.
Method 2: Check for the Options and Utility Tabs
-
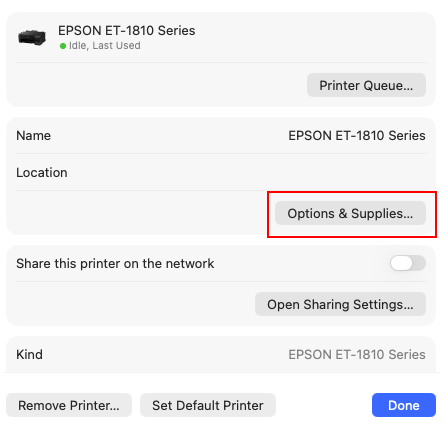
Click Options & Supplies.
-
Check whether both an Options tab and a Utility tab are shown.
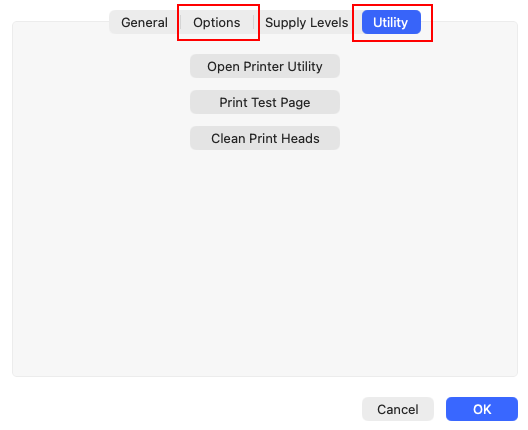
Note: If both tabs are present, a genuine Epson printer driver is installed. If they're missing, you're using the AirPrint or another generic driver instead.
Removing the AirPrint Driver
The steps below also remove any other previously installed instances of the printer driver — this ensures the correct driver is selected when printing from different applications.
-
Click the Apple menu at the top left of the screen.
-
Click System Settings.
-
Select Printers & Scanners.
-
Select the printer, then press the Remove Printer button.
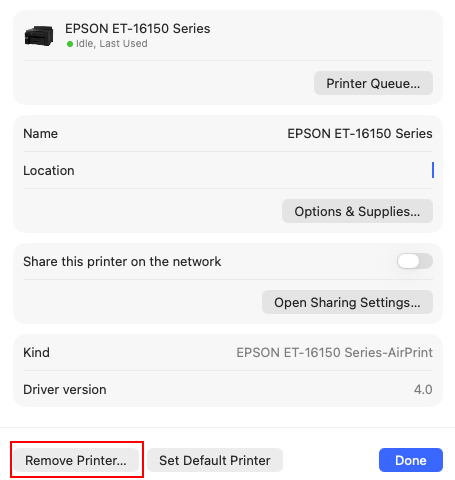
- Repeat these steps to remove every instance of the printer driver listed.
Installing the Epson Printer Driver
- Once the printer(s) have been removed, download the driver from the Epson Support website.
- Follow the on-screen instructions to install the printer driver.
-
Once installed, click the Apple menu at the top left of the screen.
-
Click System Settings.
-
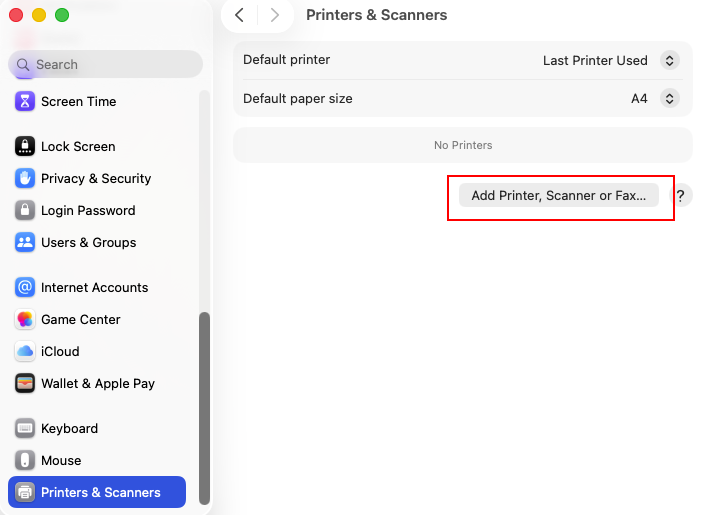
Select Printers & Scanners. Click the Add Printer, Scanner, or Fax button.
-
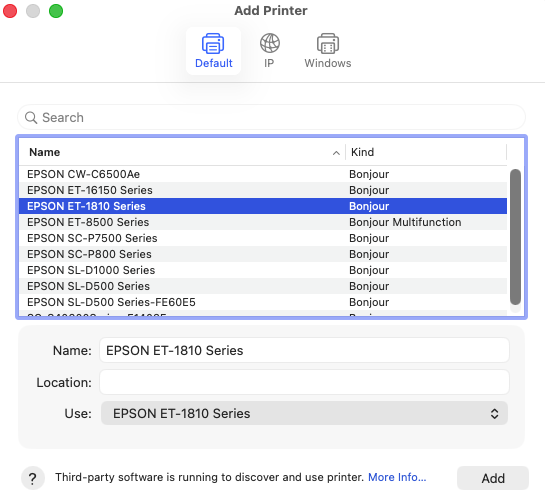
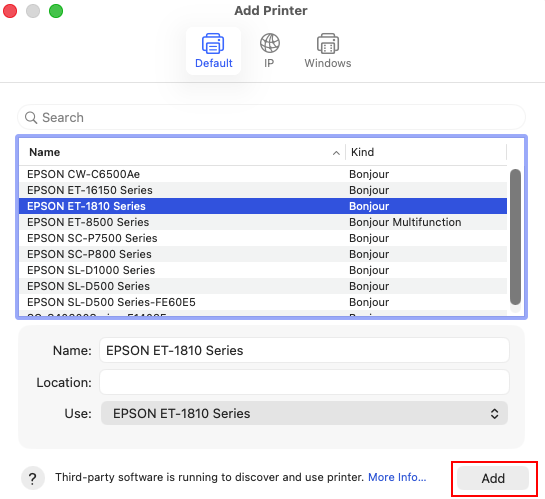
In the Add Printer window, select your printer from the list (avoid selecting an AirPrint entry, if one is shown):
- Confirm the printer is listed as Bonjour (for Wi-Fi) or USB (for a USB connection).
- Confirm "Name" shows as Epson XXXXX series (where XXXXX is your printer model).
- Confirm "Use" shows as Epson XXXXX series too.
-
Click Add to finish installation.
-
The printer will be added to Printers & Scanners.
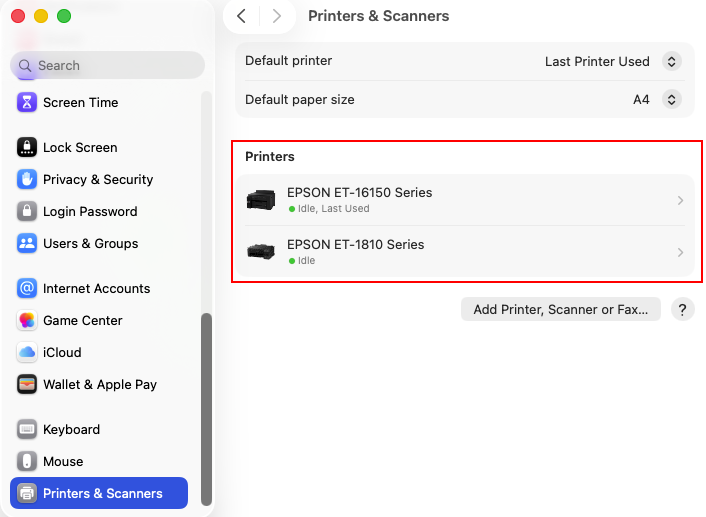
- Verify the Epson printer is installed as per Method 2: Check for the Options and Utility Tabs from above.
-
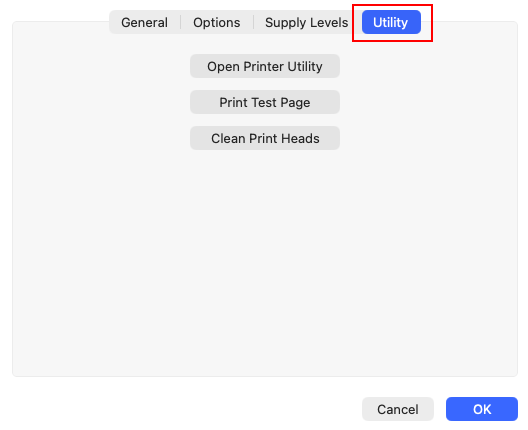
To test the printer, click the installed printer, then press the Options & Supplies button.
-
Select the Utility tab.
-
Select Print Test Page.
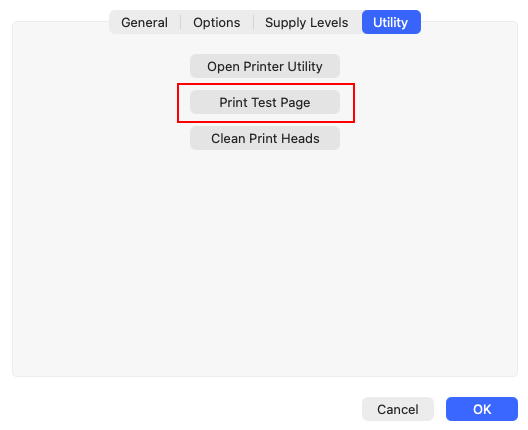
- A test page will print, confirming the correct driver is installed and working.