Linux driver and utility for ColorWorks CW-C6x00 series
Linux Environment
-
Epson provides the driver package and utility for the following OS:
- Ubuntu 18.04 (64bit)
- CentOS 7 (64bit)
- If your Linux OS version or distribution does not support the package – Epson also provide source code to build on your system. To acquire the source please contact your local Epson representative as it is not available to download from Epson-Biz in CW-C6000/C6500 series Linux driver & utility source code
Installation:
Refer to the Technical reference guide in the Linux section for a comprehensive step by step guide to install.
Even if the provided build package is supported there may be missing third party dependencies – for instance QT5 package. Check the error messages and use online sources to resolve. The list of dependencies is also listed in the Technical Reference Guide.
Adding a printer:
Start by accessing Cups using the URL “locahost:631” in the web browser.
If it is a network printer, when you “Add Printer” normally there will be at least one printer in Discovered Network Printers. Or there may be a range of printers available. Each entry has a different connection type and port.
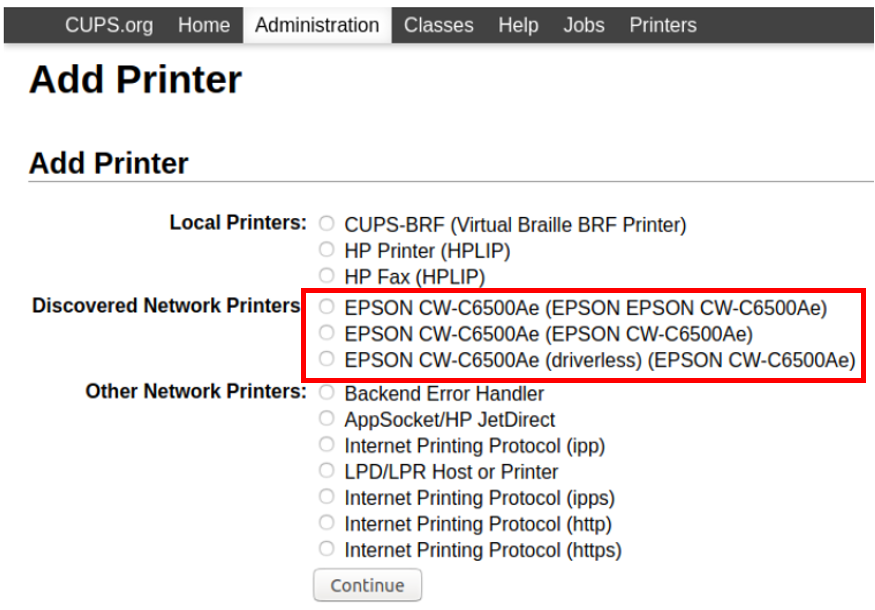
But if this section is blank, then you can choose “Other Network Printers” from:
- LPD/LPR Host or Printer
- AppSocket HP JetDirect
Each option in “Add Printer” simply provides the prefix in the next Add Printer page:
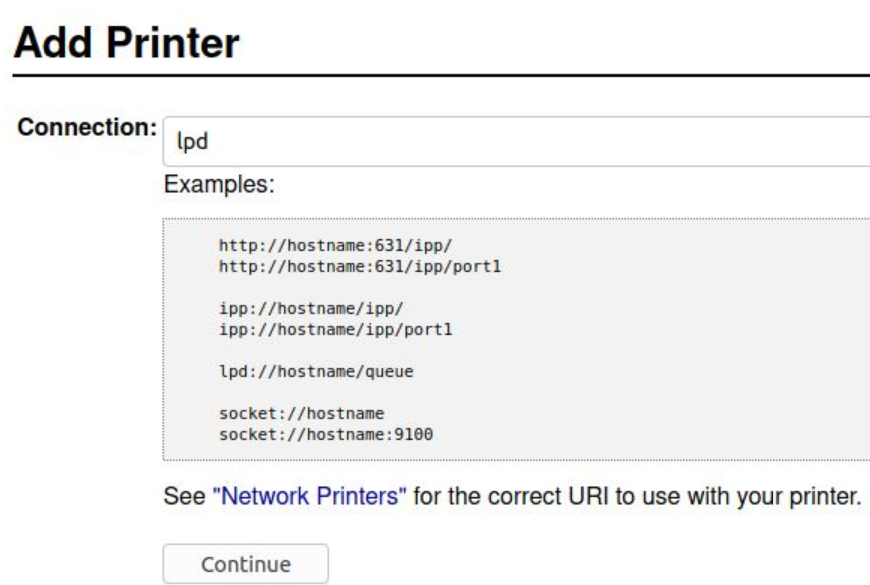
Try the following connection strings:
- lpd://:515/PASSTHRU
- socket://:9100
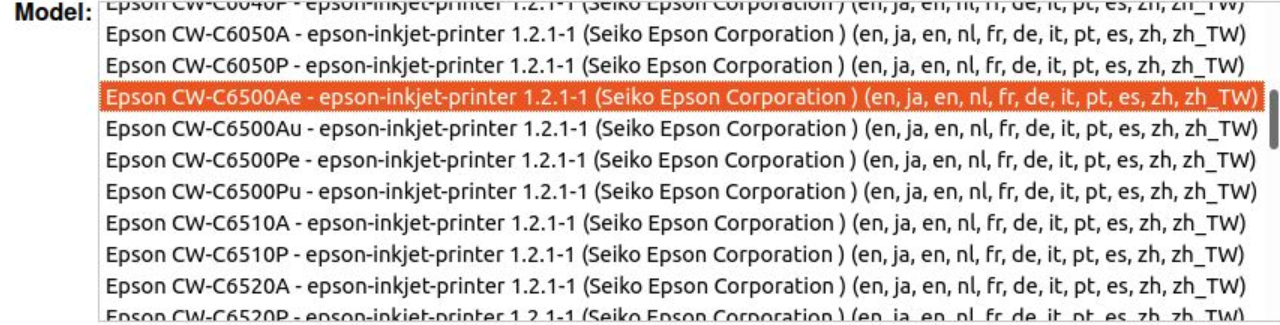
When prompted to choose a driver version, you can select the Epson driver:
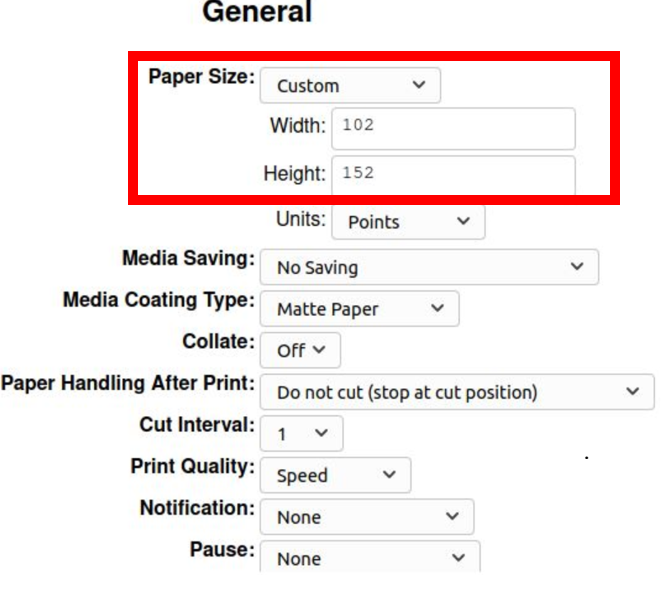
You can then specify the default options with a Custom: Width and Height.
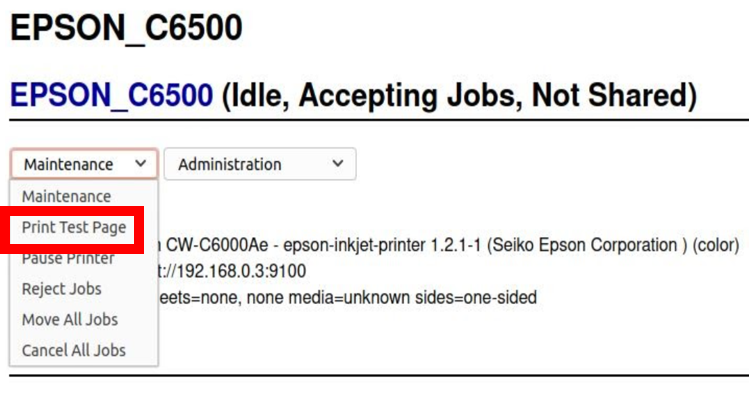
Finally perform a “Print Test Page” in Cups to ensure the printer is working correctly.
Printer Utility:
The Technical Reference Guide explains how to access the Utility via Command Line or GUI.
When running the GUI -- If the Model is indicated to be unknown and if it is stuck searching for the printer:

Then it is likely the Input Output module: epson-printer-io-community-1.0.0 is not installed. In this case, check the installation of the utility in the TRG as mentioned.
When all is working:
Figure 1: Range of features available from the top level menu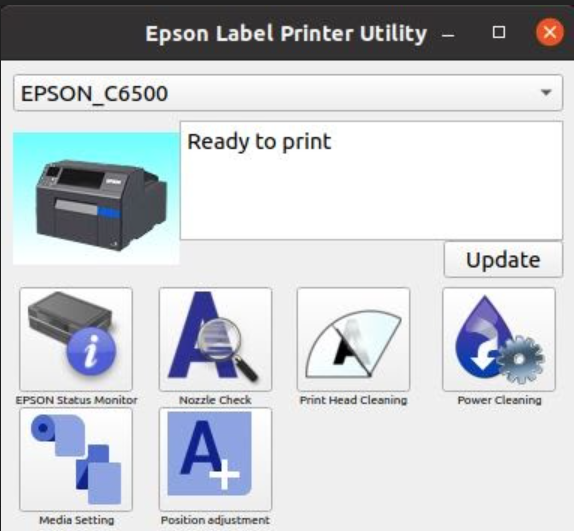
|
Figure 2: Status Monitor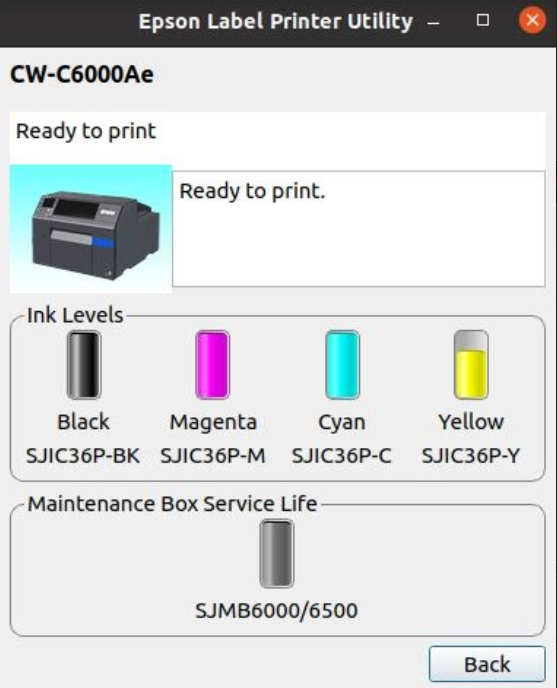
|
Figure 3: Media Detection/ Media Source and Gaps between labels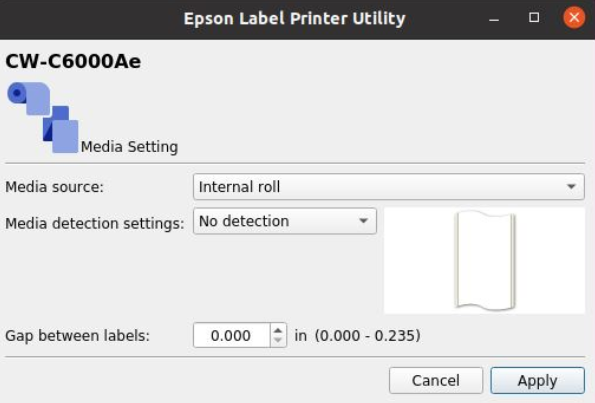
|
Figure 4: Print Start Position Adjustment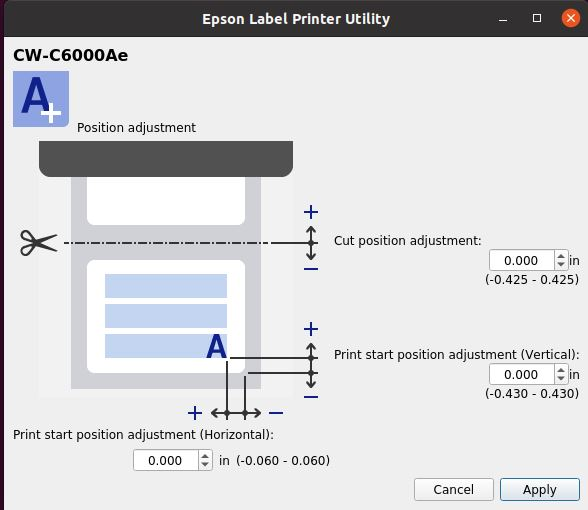
|
Command Line PrinterSetting Utility
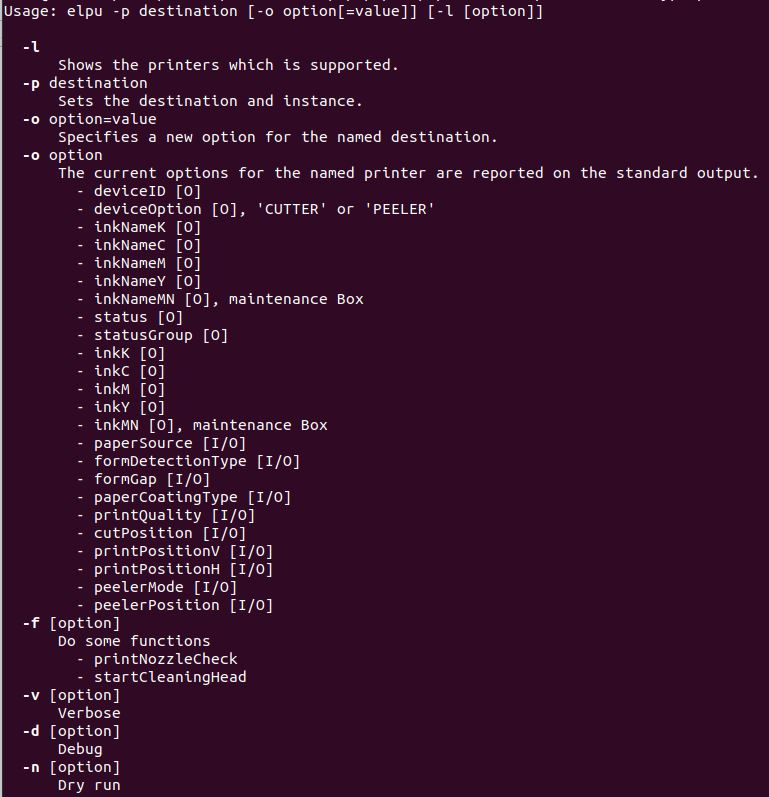
Comparing the GUI and Command Line version of the Utility. The Command Line version has additional features including peelerPosition, peelerMode and paperCoatingType. Note that peelerMode applies for the peeler model C6x00P series.
You can use the following command to get the list of destination printers:
elpu -l

An example usage of the utility to set a value is as follows:
elpu -p EPSON_C6500 -o paperCoatingType=P1
Value range for the Command Line Utility for inputs:
| Option | Values |
|---|---|
| paperSource |
IR = Internal ER = External |
| formDetectionType |
N=None M=Black Mark W=Gap |
| formGap |
[0, 142] (units) [0, 6] (mm) |
| paperCoatingType* |
P1 = Plain Paper M1 = Matte Paper S1 = Synthetic Paper T1 = Textured paper G1 = Glossy Paper GS1 = Glossy Film PG1 = High Glossy Paper |
| printQuality |
D = Max Speed S = Speed N = Normal Q = Quality M = Max Quality |
| cutPosition |
[-255, 255] (units) [-10.8, 10.8] (mm) |
| printPositionV |
[-258, 258] (units) [-10.9, 10.9] (mm) |
| printPositionH |
[-36, 36] (units) [-1.5, 1.5] (mm) |
| peelerMode* |
“N/A” on C6500Ae (For details on C6x00Pe peeler model, contact your Epson representative) |
| peelerPosition* |
“N/A” on C6500Ae (For details on C6x00Pe peeler model, contact your Epson representative) |
*Available in Command Line version of Utility, not available in GUI version
Table of comparison of Mac and Windows Utility features.
| Windows | Linux | |
|---|---|---|
| Media Source | ✓ | ✓ |
| Media Detection | ✓ | ✓ |
| Media coating type | ✓ | ✓ |
| Print Quality | ✓ | ✓ |
| Print Start Position Adjustment (V & H) | ✓ | ✓ |
| Print Start position Adjustment (from label edge) | ✓ | ✓ |
| Cut Position Adjustment | ✓ | ✓ |
| Bar width adjustment | ✓ | |
Store data in printer
|
✓ | |
| Background image settings | ✓ | |
Print Head Maintenance
|
✓ | ✓ |
|
Print Head Maintenance (set time for daily operation) |
✓ | |
|
Power on action: No feed/ Feed/ Short Calibration/ Calibration/ Measure Length |
✓ | |
| Backfeed sequence (Before/ After printing) | ✓ | |
| Beeper Volume | ✓ | |
| Reprint when error occurs | ✓ | |
| Set Clock | ✓ | |
| Print Head Adjustment | ✓ | |
| Bi-directional Printing Adjustment | ✓ | |
| Enable panel buttons (Cancel/ Feed/ Cut) | ✓ | |
| Set panel language | ✓ | |
| Set the power saving transition time after printing | ✓ | |
| Nozzle Check settings and Dot Substitution settings | ✓ | |
| Adjust media detection sensor (calibration) | ✓ | |
| Replace ZPLII commands | ✓ | |
| Set IO signal settings (to low or high enable) | ✓ | |
| Initialize printer/ factory reset | ✓ |
Printing Process:
If you print from the terminal, i.e. from LPR, then it will apply the default options to define the media settings.
lpr -P EPSON_C6500 “test.pdf”
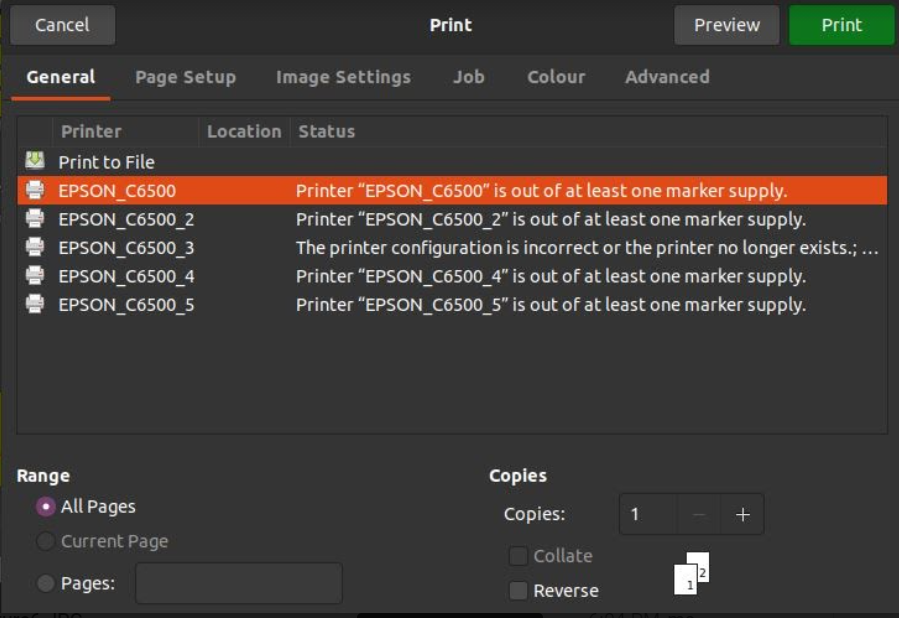
But if you print from an application such as Image Viewer. The usual printing system window appears where you can override the default options:
In Page Setup, you can select Manage Custom Sizes to define the media dimensions.
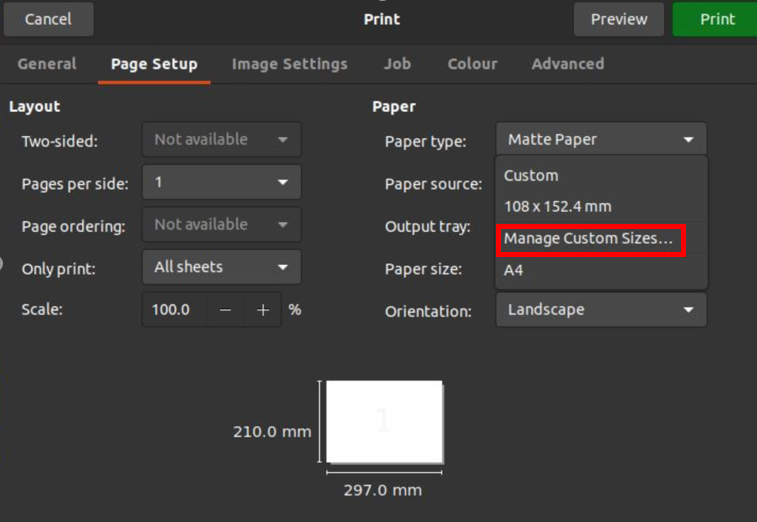
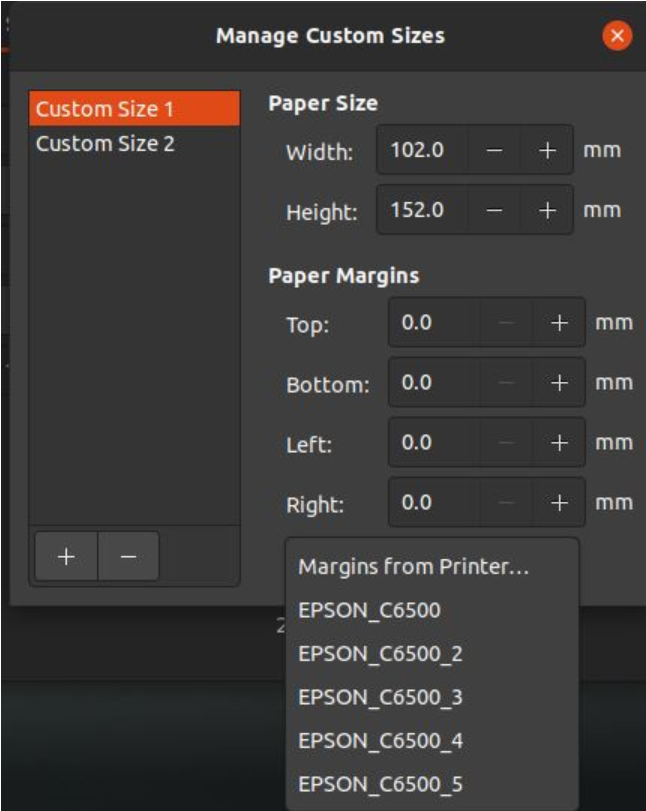
The Custom Sizes entries are enumerated as “Custom Size X”.
Set margins to zero. A feature of the CUPS driver allows you to take the Margins from the default settings of each printer.
The Advanced tab provides the essential driver parameters.
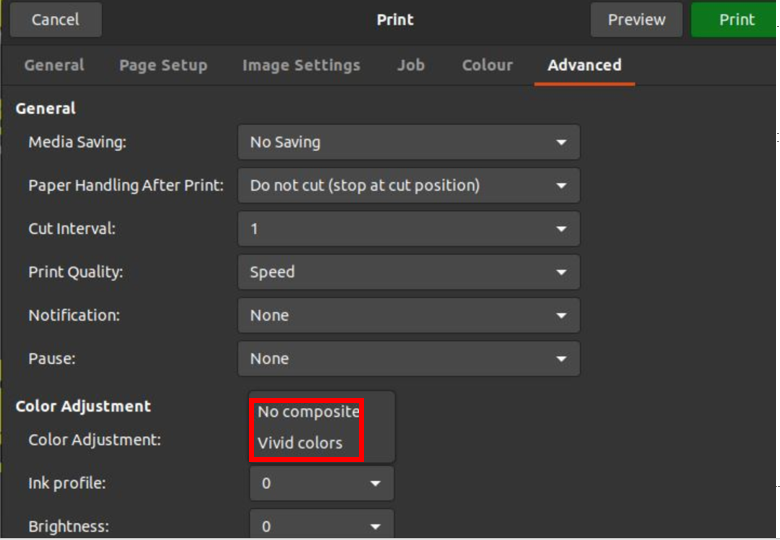
Unlike Windows and Mac, The Linux driver only provides No Composite and Vivid Colors, and there are no ICC profiles transformation performed within the driver.
Unlike in the Windows driver, Media Form with values such as “continuous label“ or ”die-cut label” are not selectable in the driver, it must be set as default in the printer using the PrinterSetting Utility.
 Note: Note: |
|---|
(Your version of the driver may show this option as “No Composite”)The colour correction option "None” allows the ICC profile to be applied to the image within the application. This is applicable in applications which allows Colour Correction E.G Gimp or Photoshop. 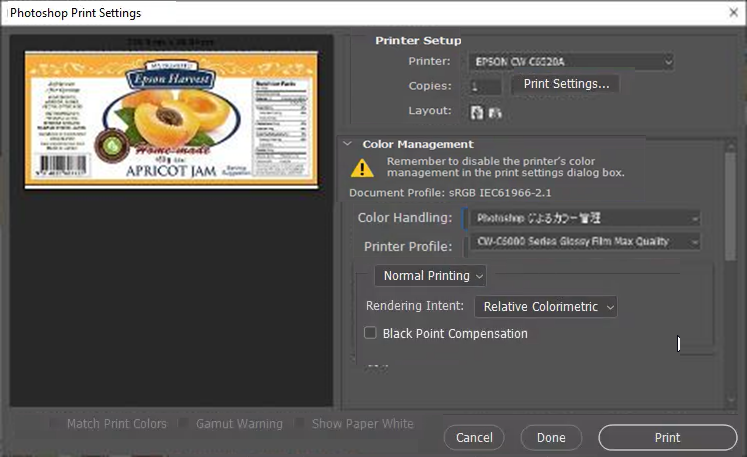
|
Vivid Colors:
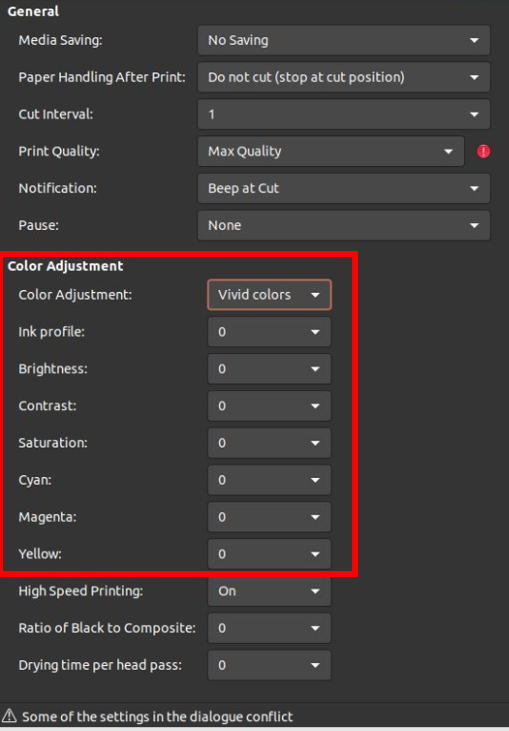
This is an inbuilt colour space in the printer that conforms to Adobe RGB. Most devices, including LCD monitors, support sRGB but Adobe RGB has a wider color reproduction range than sRGB which makes it a better choice for designers and photographers. The default Vivid Color space can be adjusted for Brightness, Contrast, Saturation, Cyan, Magenta and Yellow in the printer. These values can be adjusted in the print driver and sent with the print job, or the default values can be modified in the printer via the printer panel or Epson Webconfig. Note Vivid Color is named “Business Graphics” in Epson Webconfig.
The colour and gamma values indicated in the red border can be tweaked and sent to the printer, which override the default values.
References
Epson Biz: