How do I use the Print Head Alignment utility?
Applies To
- Operating Systems: Windows 11, Windows 10, macOS
- Hardware: Epson EcoTank and Expression Series Printers (e.g., ET-4950, ET-4850, L6390, XP-2200, and similar models)
- Software: Epson Printer Driver
- Related Articles:
Description
This article provides guidance on how to perform a Print Head Alignment using the dedicated printer utility.
Symptoms
- Prints appear blurry
- Printed text and lines appear skewed or doubled
Solution
Before proceeding, it is recommended to confirm the print head is working correctly by running Head Cleaning first. See KA-01531: When to Clean Your Print Head.
Additionally, check the following:
- Make sure no error lights are lit or flashing on the printer control panel.
- Make sure A4 size plain paper is loaded in the sheet feeder.
Quick Reference: Path by Operating System
| Operating System | Path to Maintenance / Utility Menu |
|---|---|
| Windows 11 | Start > Settings > Bluetooth & devices > Printers & scanners > [your Epson printer] > Printing Preferences > Maintenance tab > Print Head Alignment |
| Windows 10 | Control Panel > Hardware and Sound > Devices and Printers > right-click [your Epson printer] > Printing Preferences > Maintenance tab > Print Head Alignment |
| macOS | Apple menu > System Settings (or System Preferences on older macOS) > Printers & Scanners > [your Epson printer] > Options & Supplies > Utility tab > Open Printer Utility > Print Head Alignment |
Access Print Head Alignment (Windows 11 & Windows 10)
Note: If you cannot find the Head Alignment Utility in the driver, check the product screen options under the Maintenance menu, or consult your product's user manual.
Windows 11
- Select Start.
- Go to Settings > Bluetooth & devices > Printers & scanners.
- Select your Epson Printer (e.g. ET‑4950).
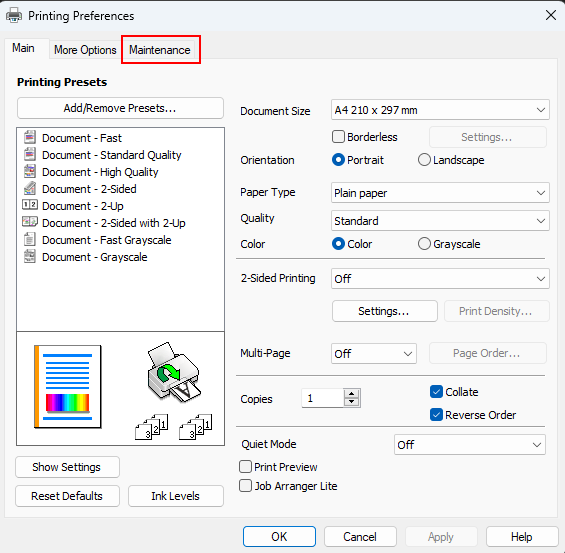
- Select Printing Preferences.
-
Open the Maintenance tab.
-
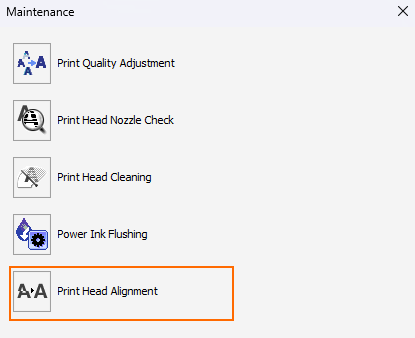
Click the Maintenance tab. The Print Head Alignment option should be displayed. If a Maintenance button appears instead, click that first
Windows 10
- Open Control Panel.
- Go to Hardware and Sound > View devices and printers.
- Right‑click your Epson Printer (e.g., ET‑4950/L6390) and select Printing Preferences.
-
Open the Maintenance tab.
-
Click the Maintenance tab. The Print Head Alignment option should be displayed. If a Maintenance button appears instead, click that first.
Use Print Head Alignment (Windows 11 & Windows 10)
- Click Print Head Alignment.
-
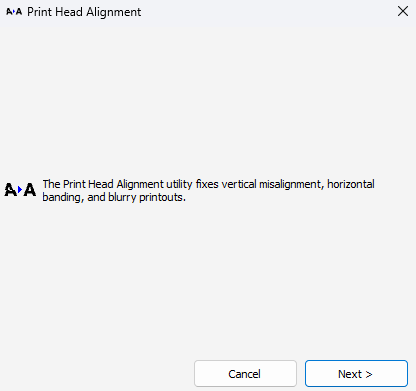
Click Next.
-
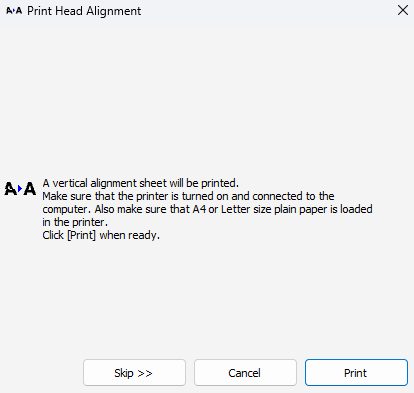
Click Print.
-
The vertical alignment sheet will print. Follow the on-screen instructions.
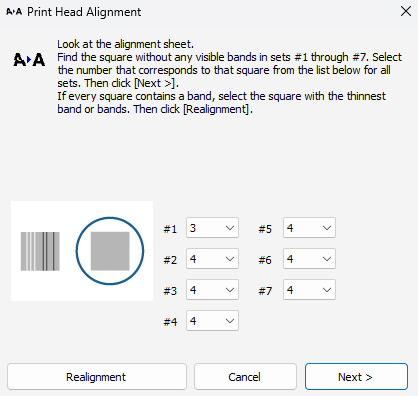
- Click Realignment (or the arrow) as required, and continue following the on-screen instructions. After checking and correcting vertical alignment, the process repeats to check and correct horizontal alignment.
Note: This process may differ depending on model. For the full guide, consult your product's user manual.
Access Print Head Alignment (macOS)
Note: Print Head Alignment option in the driver is available for some specific models. Check the product screen options under the Maintenance menu, or consult your product's user manual.
macOS
- Open the Apple menu and choose System Preferences (or System Settings in newer macOS versions).
- Select Printers & Scanners (or Print & Scan / Print & Fax).
- Choose your Epson Printer (e.g., ET‑4950/L6390) from the list.
-
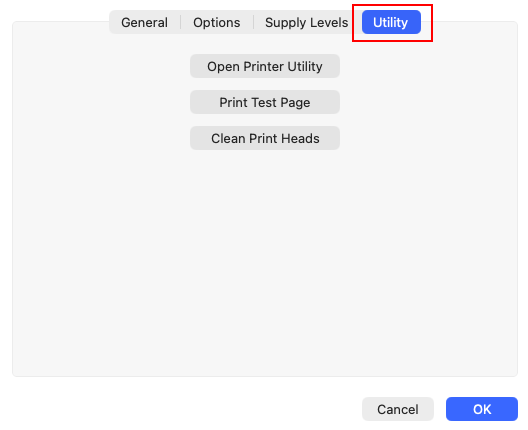
Click Options & Supplies, then go to the Utility tab.
-
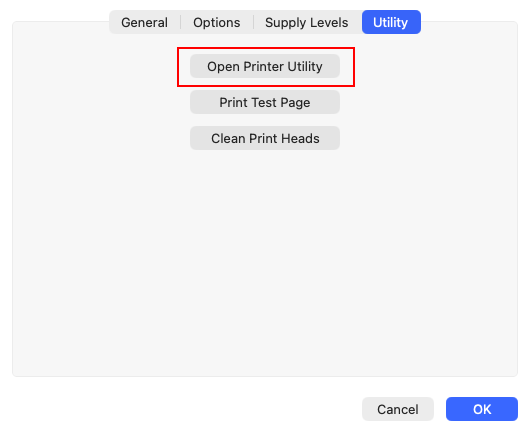
Click Open Printer Utility to access the Epson maintenance tools: Print Head Alignment.
-
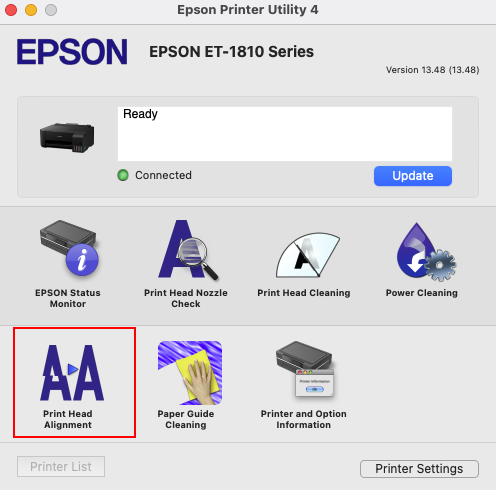
Click Print Head Alignment.
-
Read the on-screen instructions, then click Next.
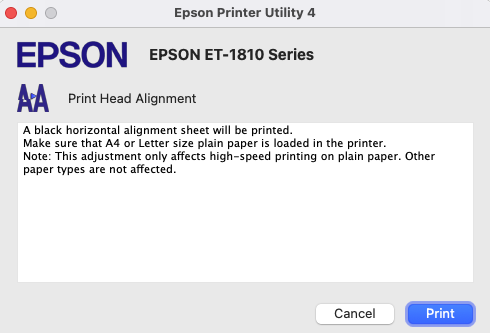
- Click Print. An alignment sheet will print.
-
Follow the on-screen instructions and check the alignment sheet.
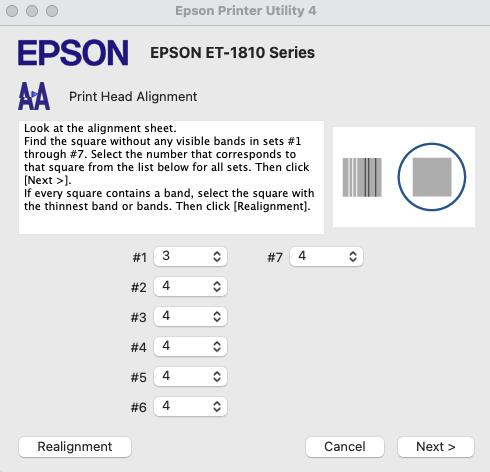
In the alignment pattern example, the print head is correctly aligned when the printed lines line up with the centre position (in the example, number 4). The drop-down menus always default to a value — read the instructions carefully and select the best match.
Find the most aligned pattern in each section. If it already matches the default value shown in the drop-down, the print head is already aligned — click Next. Otherwise, select the number of the best-matching pattern from the drop-down for each section, then click Realignment. Continue following the on-screen instructions to complete the check.