How to perform a basic scan using Document Capture Pro
Applies To
Description
This article explains how to scan a document, review the scanned pages, and save the final file as a PDF or other supported format.
Document Capture Pro enables you to quickly scan and create PDF copies of your documents. This article explains how to complete a scan and use some of its features.
Note: Document Capture Pro requires a compatible Epson scanner driver, such as Epson Scan or Epson Scan 2, to be installed. If you haven't installed Document Capture Pro yet, see KA-01614.
Solution
- Open the Document Capture Pro application.
- Load the document into the scanner — see your scanner's user guide for guidance on loading documents.
-
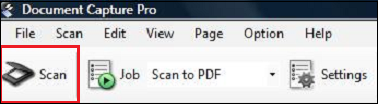
Click Scan.
-
In the Scan window, adjust settings such as Document Size and Resolution as needed, then click Scan.
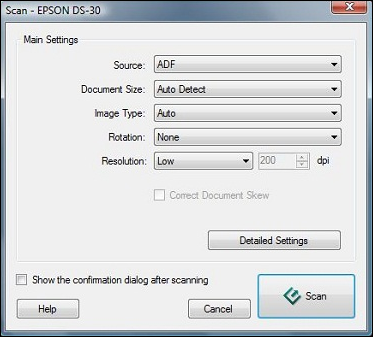
Note: The Detailed Settings option opens the normal Epson Scan window for your product, giving more control over scan settings.
-
Once scanning finishes, each page appears as an image for preview before saving:
-
Fix skew or orientation issues using the tools shown.

-
Reorder pages using the arrow icons; add or remove pages using the plus and cross icons.

-
Fix skew or orientation issues using the tools shown.
-
Once the file looks correct, click the open-folder icon to open the Save As window. Adjust the settings as needed, then click OK to save.
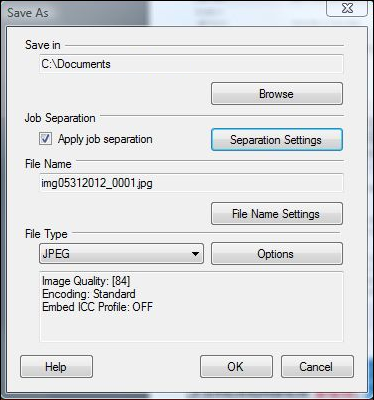
Note: Ticking Apply job separation on the Save As window automatically sorts documents into separate files, detecting blank pages or barcodes inserted between scanned pages. For details, see the Job Management section of Document Capture Pro's own Help guide (click Help at the top of the window).
Tip: To create a searchable PDF, scan documents directly to Searchable PDF format. See KA-01597: How to Create a Searchable PDF using Document Capture Pro for details.
This video details how to perform a basic scan using Document Capture Pro: