How can I scan to a folder with Document Capture Pro Server?
Applies To
Operating Systems: Windows Server 2012, 2012 R2, 2016, 2019, 2022, 2025
Hardware: WorkForce DS-5500N, DS-6500N, DS-7500N, DS-50000N, DS-60000N, DS-70000N
- Related Articles:
Description
To scan to a folder, the destination folder needs write access permissions set correctly, then a scan job configured in Document Capture Pro Server (DCPS).
Solution
1. Set Folder Permissions
The destination folder needs write access for Everyone or Network Service. For example, if your folder is C:\myharddisk\myfolder\, give "myfolder" write access as follows:
- Right-click the destination folder and select Properties.
- Click the Security tab.
- Click Edit and select Write access for Everyone or Network Service.
2. Set Up the Scan Job in Document Capture Pro Server
- Log in to DCPS.
-
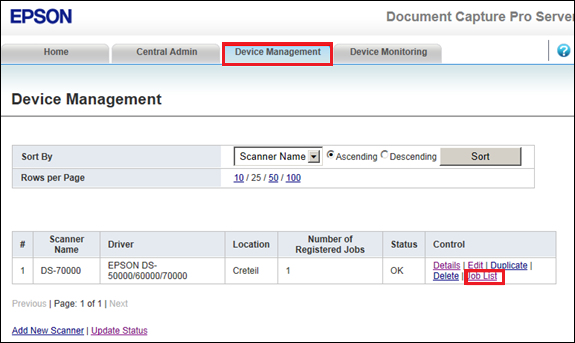
Select Device Management and click Job List for your scanner.
-
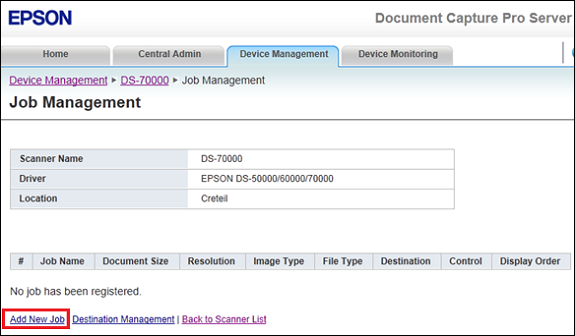
Click Add New Job.
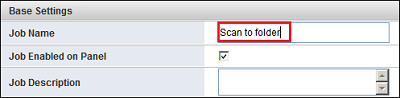
- Enter a Job Name — something identifiable, such as the destination folder or document type.
-
Confirm Job Enabled on Panel is ticked.
-
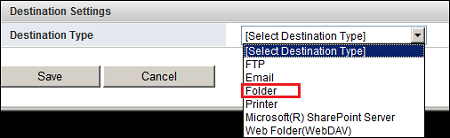
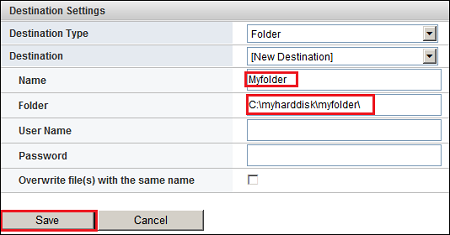
Select Folder from the Destination Type drop-down.
- Enter a name in the Name field, and the full folder path in the Folder field (e.g.
C:\myharddisk\myfolder\). -
Click Save.
- To run the job, select it from the Job List on the scanner's control panel.