Uploading Self Signed SSL Certificates with WebConfig | New Layout
RELATES TO:
In this article we are going to look at how to upload self-signed certificates to the printer which enables the secure SSL connection to the printer over a LAN or Wi-Fi connection.
Supported Printers:
- TM-T88VII
EXPLANATION:
As security and secure connections becomes more of a requirement, we are going to look at how self-signed certificates can be uploaded easily to the supported TM printers. This makes the TM Printers more secure which brings many features to the printer such as secure data transfer, redirection to fake websites and hidden usernames and passwords.
Looking at the above let’s see how the issues above can be exploited if your printer doesn’t have a secure connection. Usernames and passwords are visible in data packet capture without an SSL secure connection which means other users that shouldn’t have access to these can easily get a view and use these. Another example is that data is not encrypted so any confidential information such as credit card numbers or print data can easily be viewed. When a secure SSL connection is established then the data is encrypted point-to-point so the transfer of data can’t be viewed.
This article will look to see how a certificate is uploaded to the printer via WebConfig to allow SSL connections.
The first step in this process is to connect the printer via a LAN connection and assign the printer either a DHCP or static IP address. Once the IP address has been assigned, we can then connect to this printer and enter the WebConfig via an internet browser.
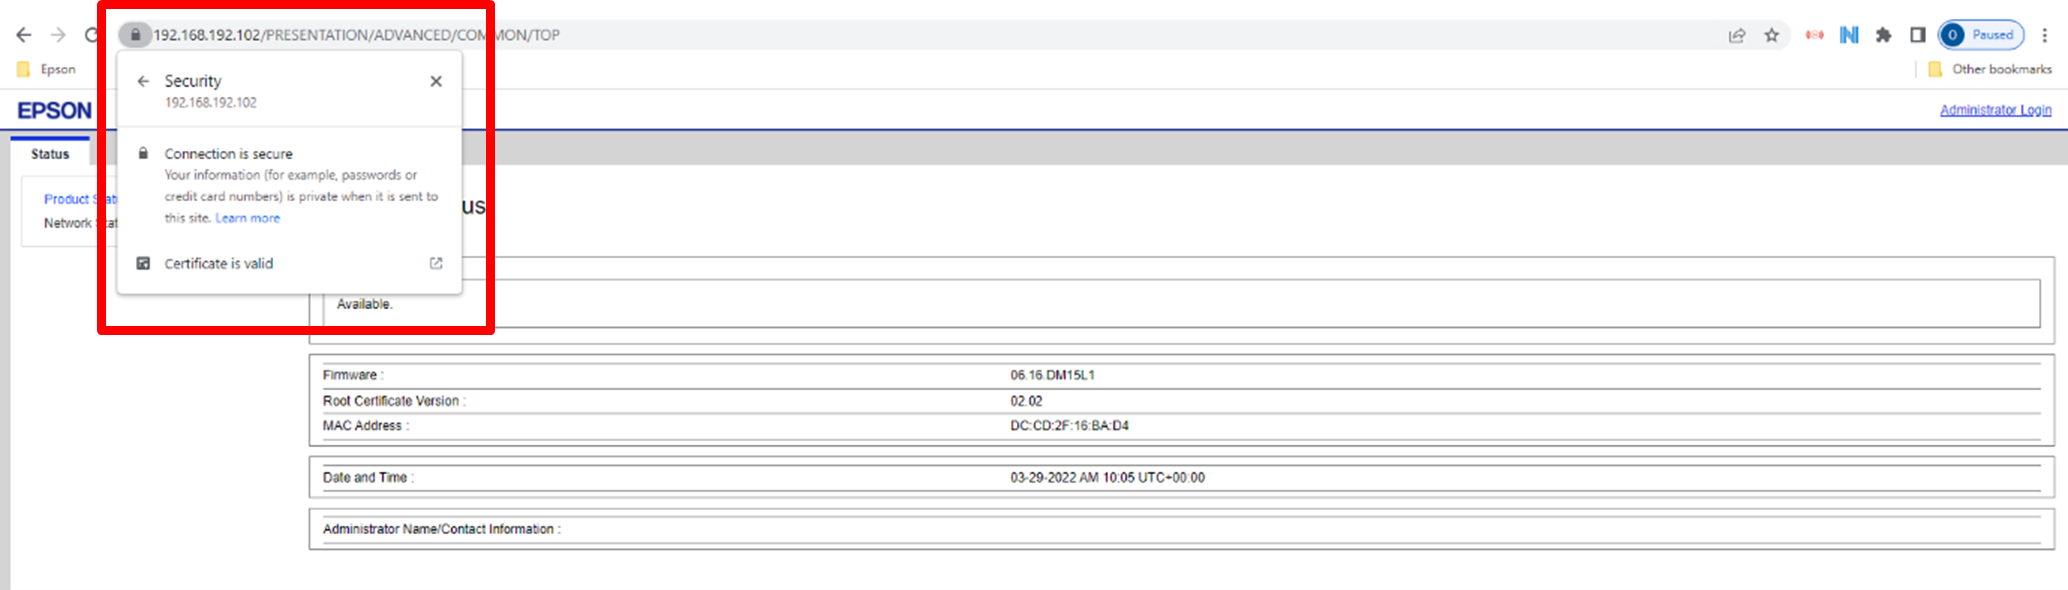
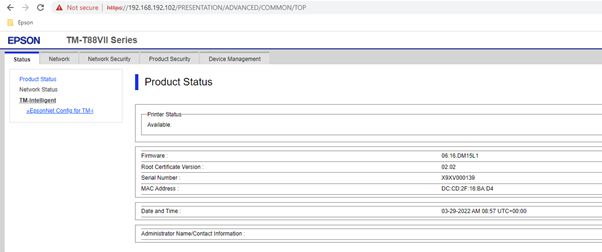
Please enter the IP address on the printer in the address bar of your browser. The status of the printer will be displayed. Once the page has loaded press “administrator Login” in the top right-hand corner and a password prompt will appear. Enter the printer’s password (default can be found in the Technical Reference Guide of the printer in use) and press ok. See figure 1. This will then load the WebConfig of the printer. See figure 2

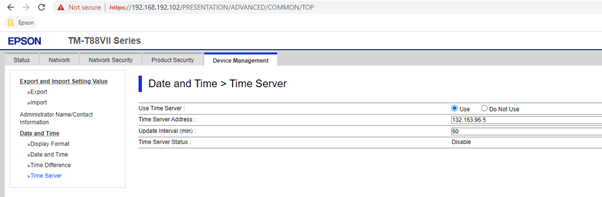
Now we have gained access to the WebConfig of the printer we need to make sure the time server settings are enabled and correct. This is because to use certificates and SSL connections an updated time stamp is required from the time server.
To enable the time server, navigate to the Device management option at the top. Then under the time and date setting option on the left-hand side select “Time Server” and this will open the configuration page to set the time sever. Once this page has loaded, please enable by selecting “Use” on the option time server, the time server address and what the update interval time you require. Once done press ok and this will enable the time server in the printer. See figure 3 for how the time server is configured.
| If there is any time difference that is required, please enter the option “Time Difference” and add this here. |
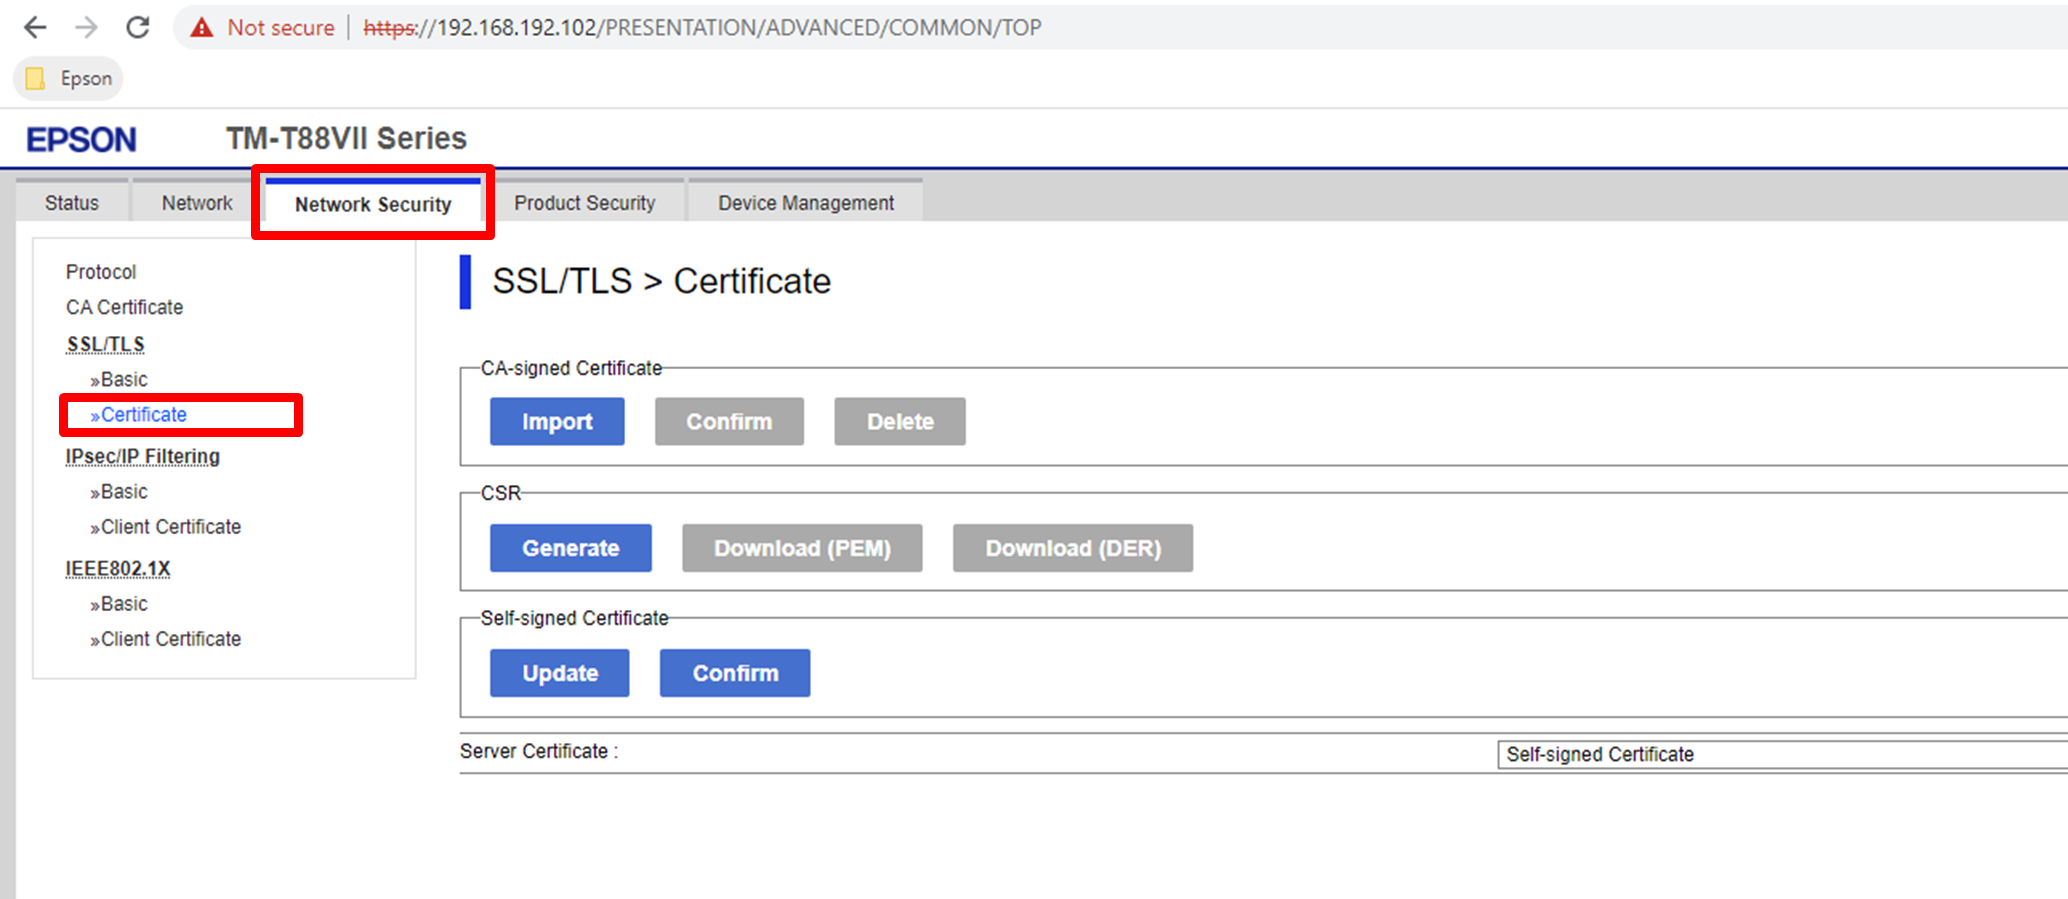
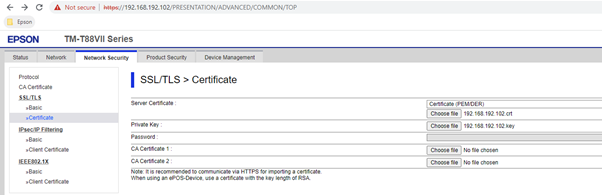
Now we have the time server enabled your certificate can now be uploaded to the printer. The first step is to go to the page “network Security” and then under SSL/TLS select “Certificate” which starts the process of uploading the certificate. This can be seen in figure 4.
Now Click on “Import” under the heading CA-signed certificate and this will now load the next screen for uploading. This can be seen in figure 5. When uploading a certificate to the printer the certificate type is required. There are two types of certificates that can be uploaded, these are PEM/DER Certificate, or a password protected PCKS#2 Certificate. Please select the type of certificate being uploaded. Next is to choose the certificate from your file browser and this is done by selecting “Choose file”. This will launch your local file explorer and navigate to your certificate and press open. Next is to upload the private key associated to your certificated. This is done by pressing the “Choose file” button and selecting the file from the file browser. Depending on what certificate you are uploading a certificate password maybe required. Use the password field for this. See figure 5 for the details required. Once the data has been inputted press the “import” button and the certificate will be uploaded and saved to the printer.
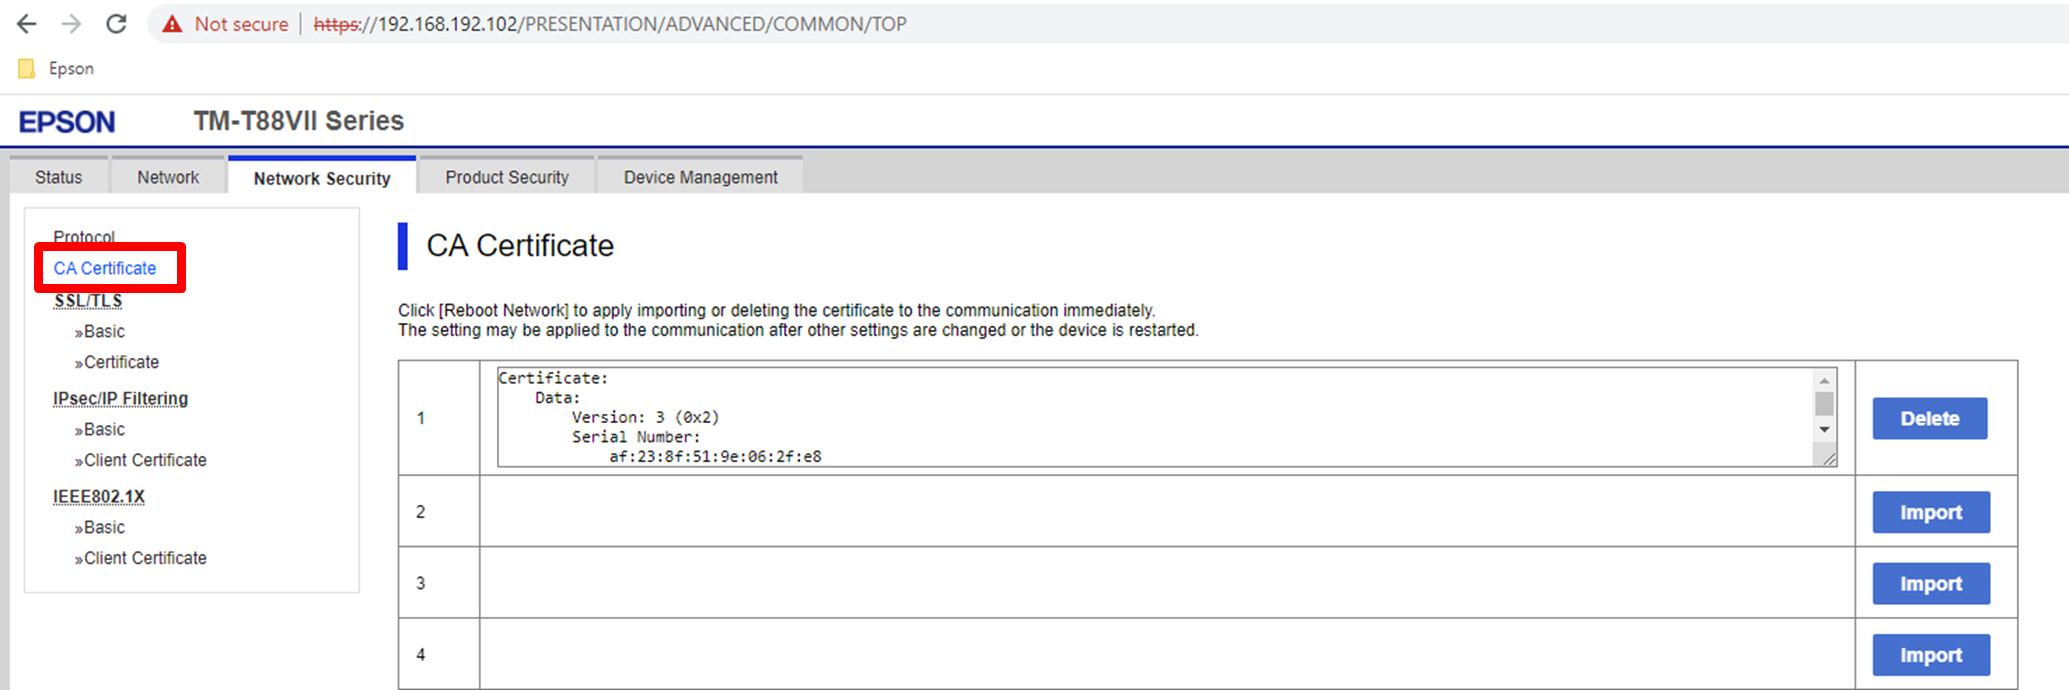
Once the certificate has been uploaded head over to the “CA Certificate” which shows and helps to manage what certificates are currently installed on the printer. First step is to press the import button on position 1 and import the certificate from the previous step. Once completed this is an overview but if any certificates needs to be deleted it can be done via this screen. Please see figure 6 where you will see the certificate we have uploaded to the printer.
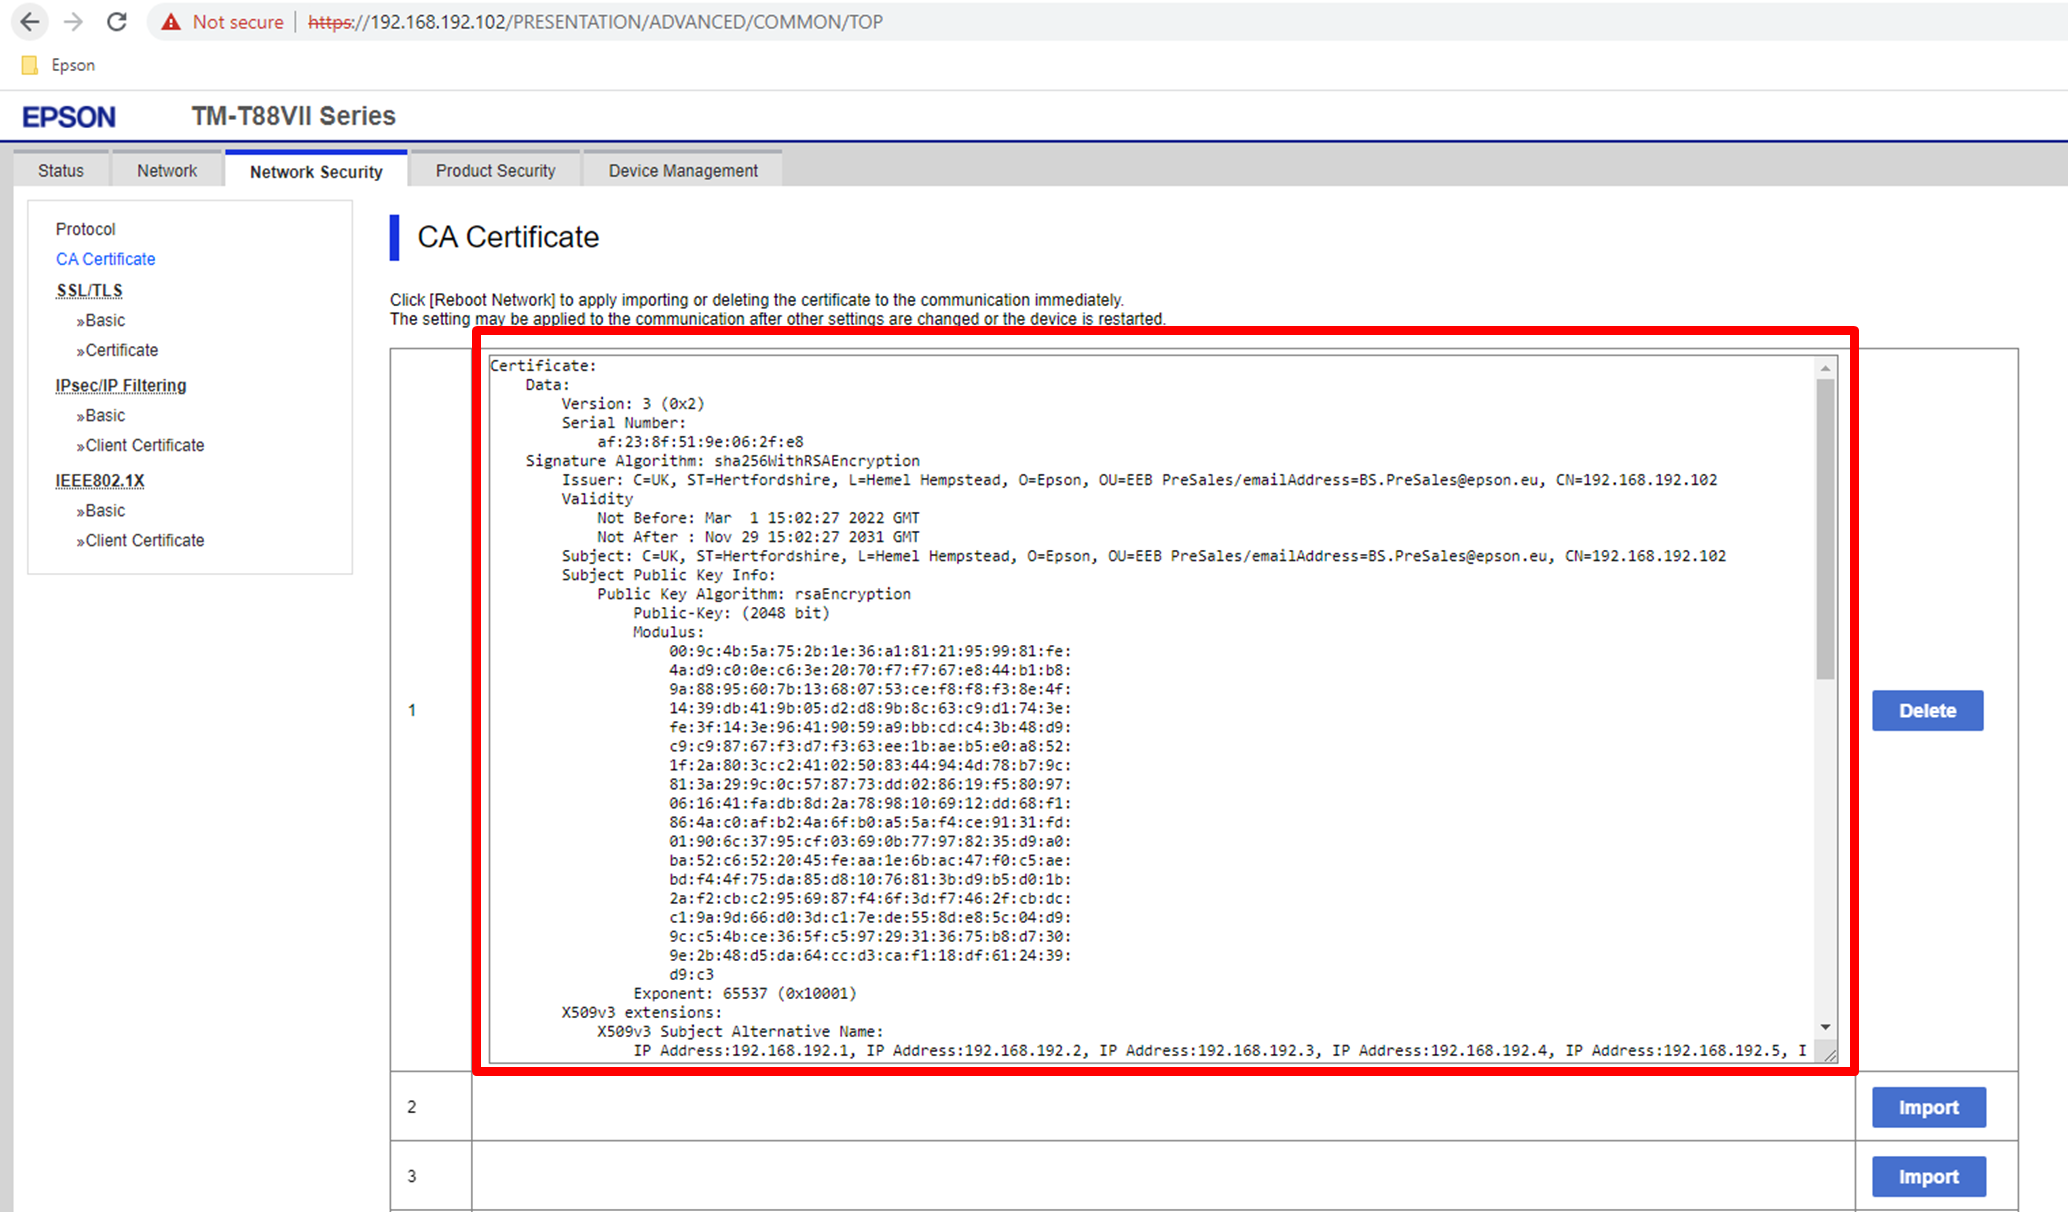
If the details of these certificates need to be viewed such as expiry date and start date you can do this in the CA Certificate list. In the middle of this page in the text box displayed all the details of all the certificates loaded on the printer can be viewed. Please see figure 7 on how the details look. This helps with managing certificates and checking the expiry date.
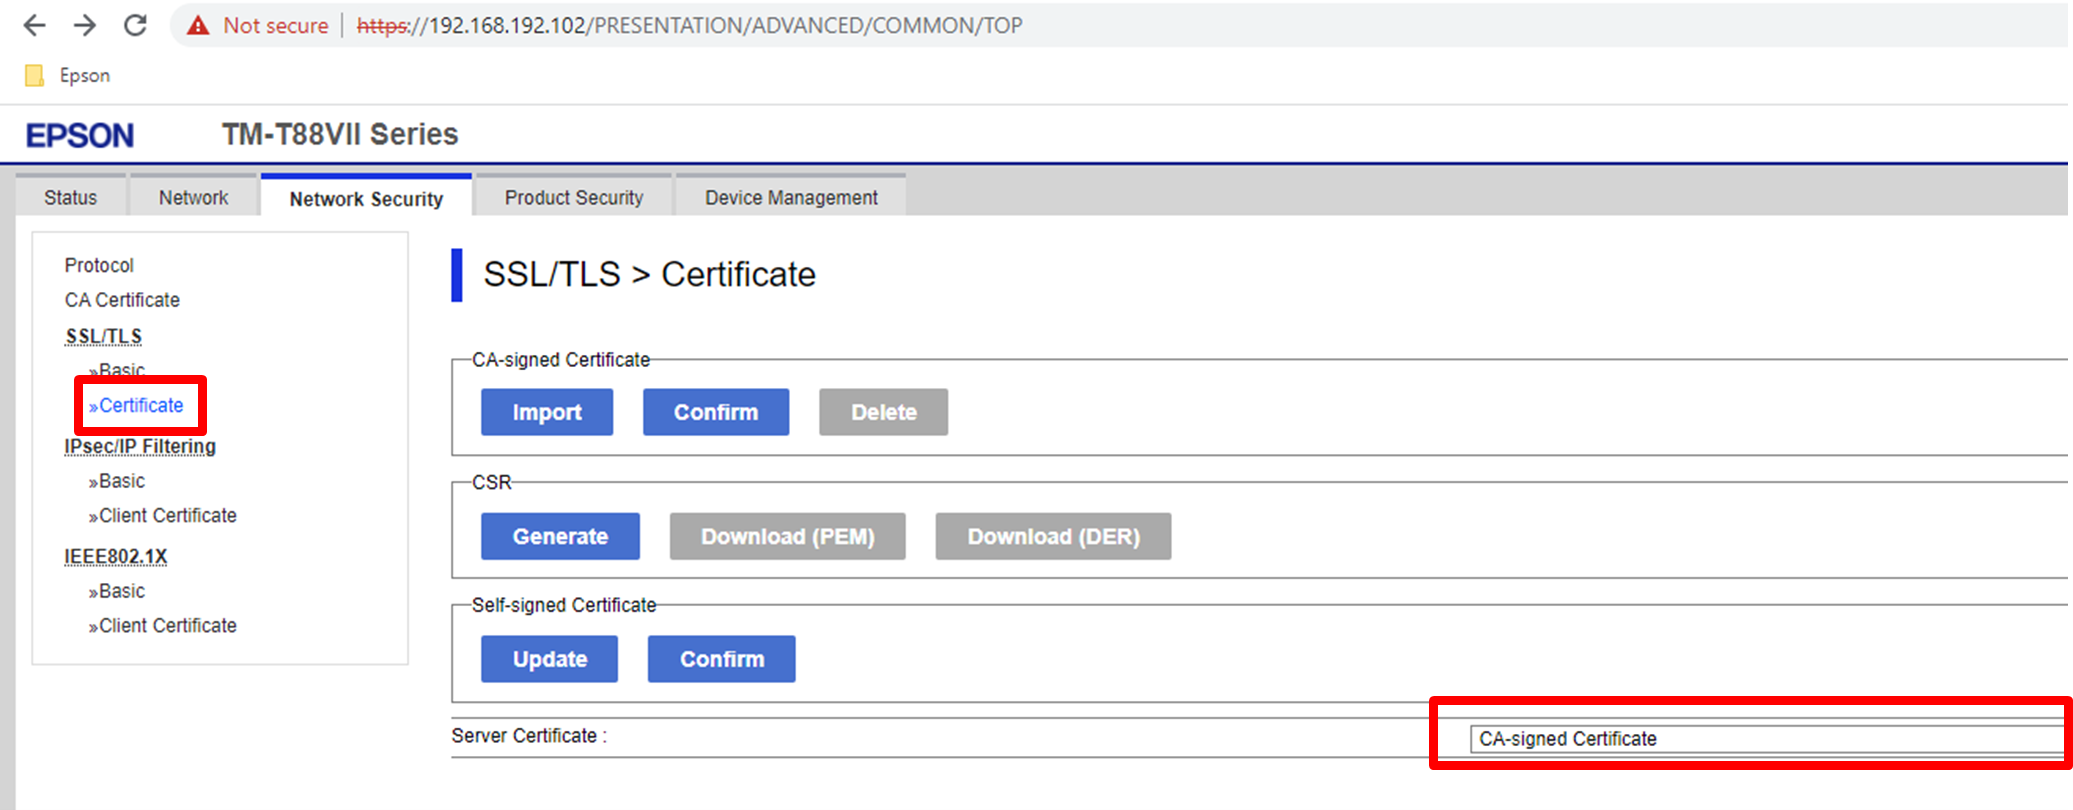
Now we need to tell the printer what certificate to use on an SSL/TLS connection and what strength of encryption is required. For this please navigate to the section Network Security – SSL/TLS - Certificate and open this page. At the Bottom of the page is the configurable options related to the certificates installed. The option server certificate is what certificate you would like to use on SSL/TLS connection. For this one as our certificate is uploaded to CA-Signed Certificate we will select this option. See figure 9. Press next and Ok to save this setting.
The next step is to choose is your encryption strength and the last configurable option is to redirect any HTTP traffic to HTTPS. This is done on the SSL/TLS – basic page. Having this enabled makes your connection very secure. See figure 10.

Once the ok button has been pressed the configuration will be sent to the printer. With the setup now complete we can connect to the printer via a HTTPS connection. For this please also make sure your browser has the certificate installed. This is very important that the certificates match to establish a secure connection. When the bowser starts, navigate to the address bar and enter HTTPS://###.###.###.### and this will start the secure connection to the printer. You login as in figure 1 and now you will notice that the padlock is displayed, and the connection is now a fully secure SSL/TLS connection to the printer. Please see figure 11 for how the secure connection looks.
| ###.###.###.### is the IP address of your printer. |